The Whole Nine Yards...From Scratch
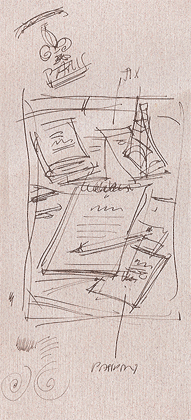
A more urgent need: the "save-the-date" announcement. Their guests would need time to get all their paperwork in order before hopping a plane to France. It was imperative they knew about the upcomming wedding ASAP.
I thought of what I'd need to do, were I lucky enough to be invited. I'd go to my desk and look for my passport, get it renewed, buy tickets, take a crash course in French, etc etc. The idea of illustrating a home desktop occured to me. I began sketching as I described it to the bride. Meanwhile, the groom (on the other extension) added his two cents worth, namely the addition of the fleur de lis making an appearance on the guide-book's cover. I suggested this is the place for the required Eiffel Tower: sneak it into the still-life as a paperweight.
Scanning that sketch in and e-mailing it off sealed the deal.
Cool beans! Off to the drawing board to do the job in earnest.

Only a few tweeks here and there....circling the "big event's" memo was tried, then abandoned. Adding an asterix next to it and finally an underline (suggested by the mother of the bride...often the driving force in wedding descisions) made it obvious that the viewer was not to miss that last entry in the "things to do in Paris" list.
Not so fast... I learned that a second pre-invitation mailing was to inform guests what hotels to book. I suggested we send out the map at this point, rather than with the invitation. Maps which go out with an invitation have a risk attached, they may overpower or dilute the main event. here was a perfect and, it turned out, logical place for it.
The composition would be a still life as before. The map spread out and held open by the paperweight from the earlier composition. Sketching and e-mailing the image below sealed that deal.
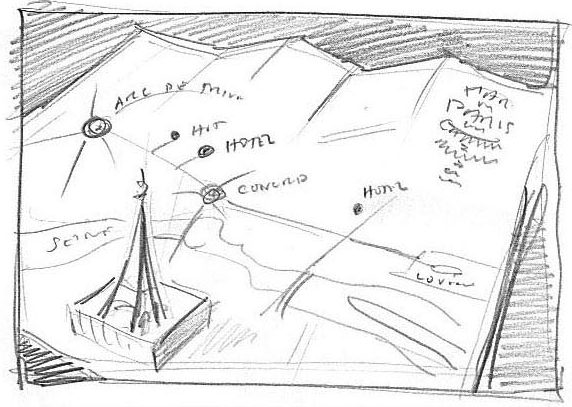

The red pencil, seen in the save-the-date card was included here and put to use writing notes and drawing arrows to the various points just as you might do with a "real" map of Paris.
I added the location, too. A bistro table with appropriate beverage. The fleur de lis was placed in the map's title because it was a symbol gaining inflence in the design of the invitation. The colors chosen for the map would, too, be used in the invitation. Everything was falling into place.

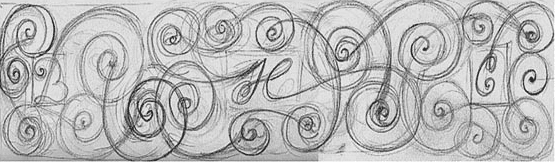
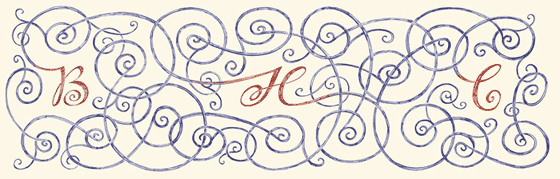
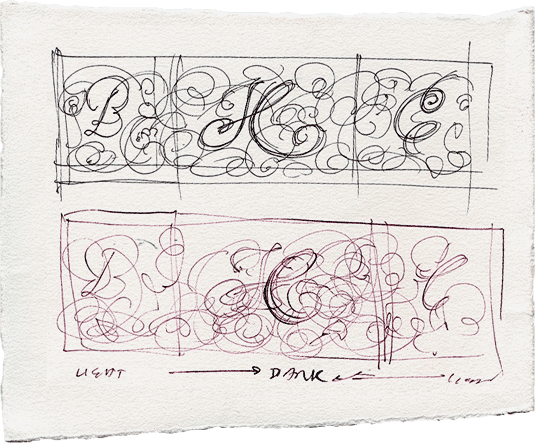
The bride wanted a gate idea to be incorporated in the design somehow. She admired a map I had produced which had an elaborate border of curling lines which reminded her of wrought iron gates she remembered seeing in Paris. Within the ironwork we could place the initals of the couple.
Sounds good to me. Gosh, look at the time! Eight-thirty already, off to dinner I went.
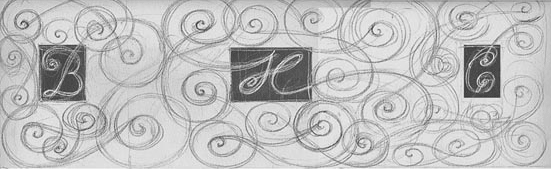
I hit on an idea while sitting at a bar drinking a beer. Grabbing a scrap of paper I sketched the image above. The next day I redrew the image you see below which shows the invitation closed, then open and, finally showing the backside opened as well. I scanned the image and emailed it off to the bride.
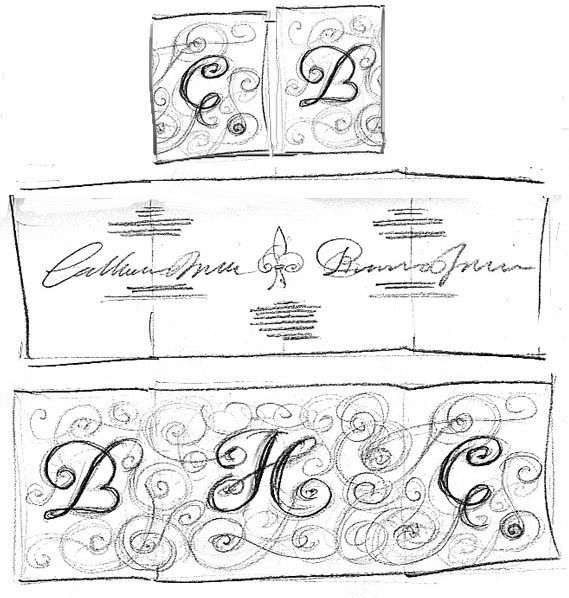
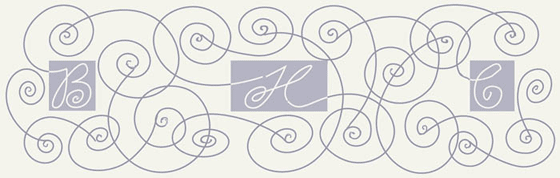
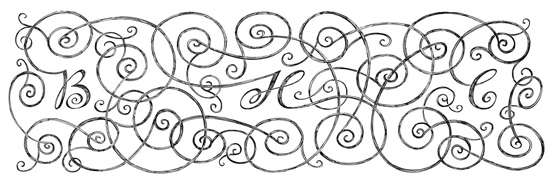
Drawing the image at full scale in pencil lead me to the image below.